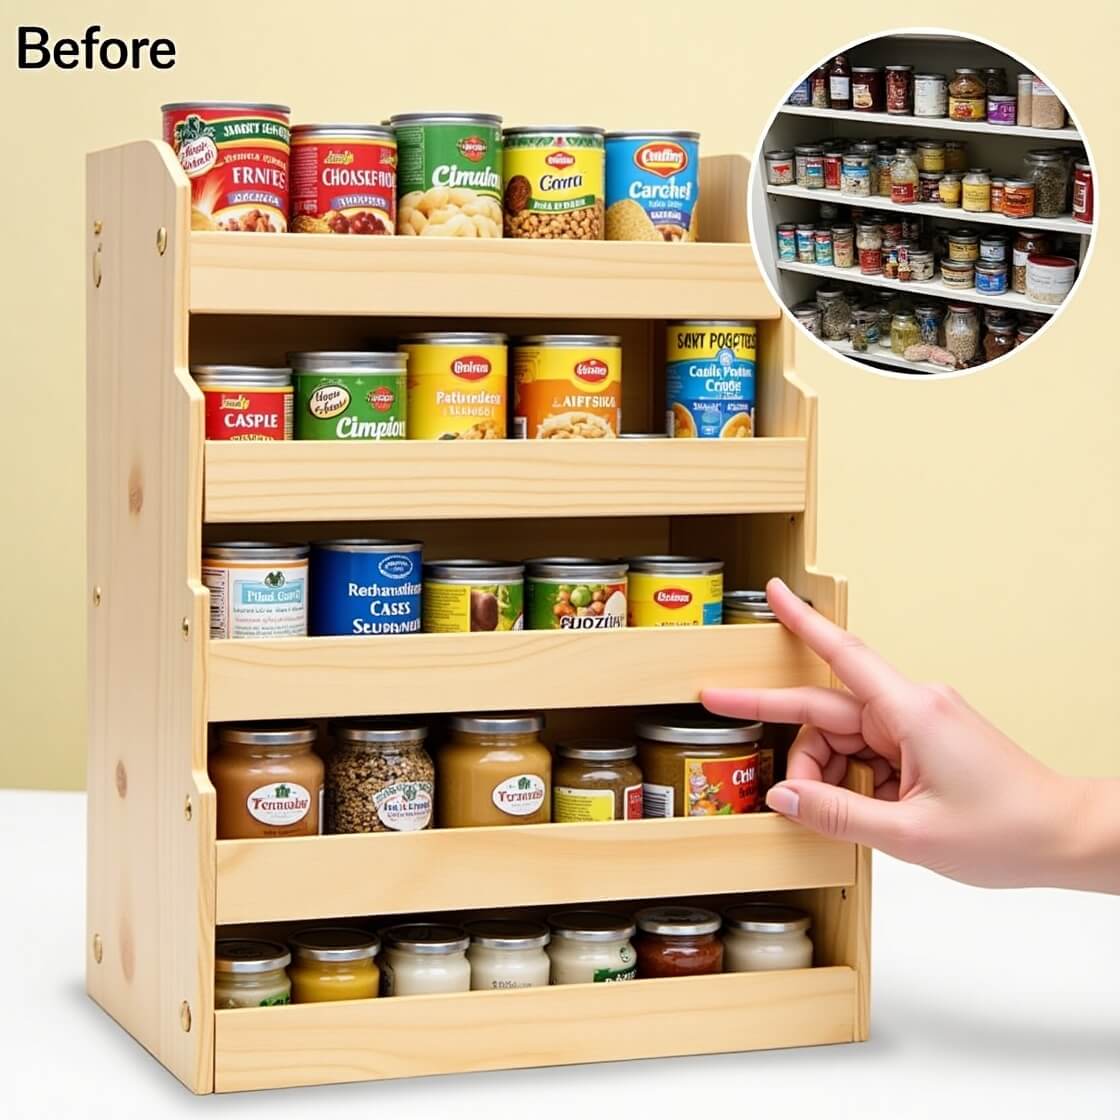
I’ll be honest with you—my pantry used to be a disaster zone.
You know those “before” photos you see on Pinterest with bags toppling over and cans wedged in at weird angles?
That was my reality, minus the pretty filter.
I’d open the door, sigh, and then shut it again, pretending the chaos didn’t exist.
But after one too many “where did I put the brown sugar?” moments (and a bag of flour that exploded on me, true story), I decided enough was enough.
The Day I Hit Rock Bottom (and Why I’m Glad I Did)
It was a rainy Saturday. I’d just come back from the grocery store, arms full of stuff, only to realize I had nowhere to put any of it.
There were three half-used bags of rice, a graveyard of stale crackers, and—this is embarrassing—two unopened jars of peanut butter because I kept forgetting I already had some.
That was the moment I knew I needed a change.
Step 1: The Big Empty (and a Little Panic)
I started by pulling every single thing out of the pantry.
I’ll admit, I panicked a little when I saw everything spread out on the kitchen table.
It looked like I was preparing for the apocalypse.
But once I started tossing expired stuff (goodbye, mystery can from 2021), the anxiety faded.
Wiping down those shelves felt like a fresh start.

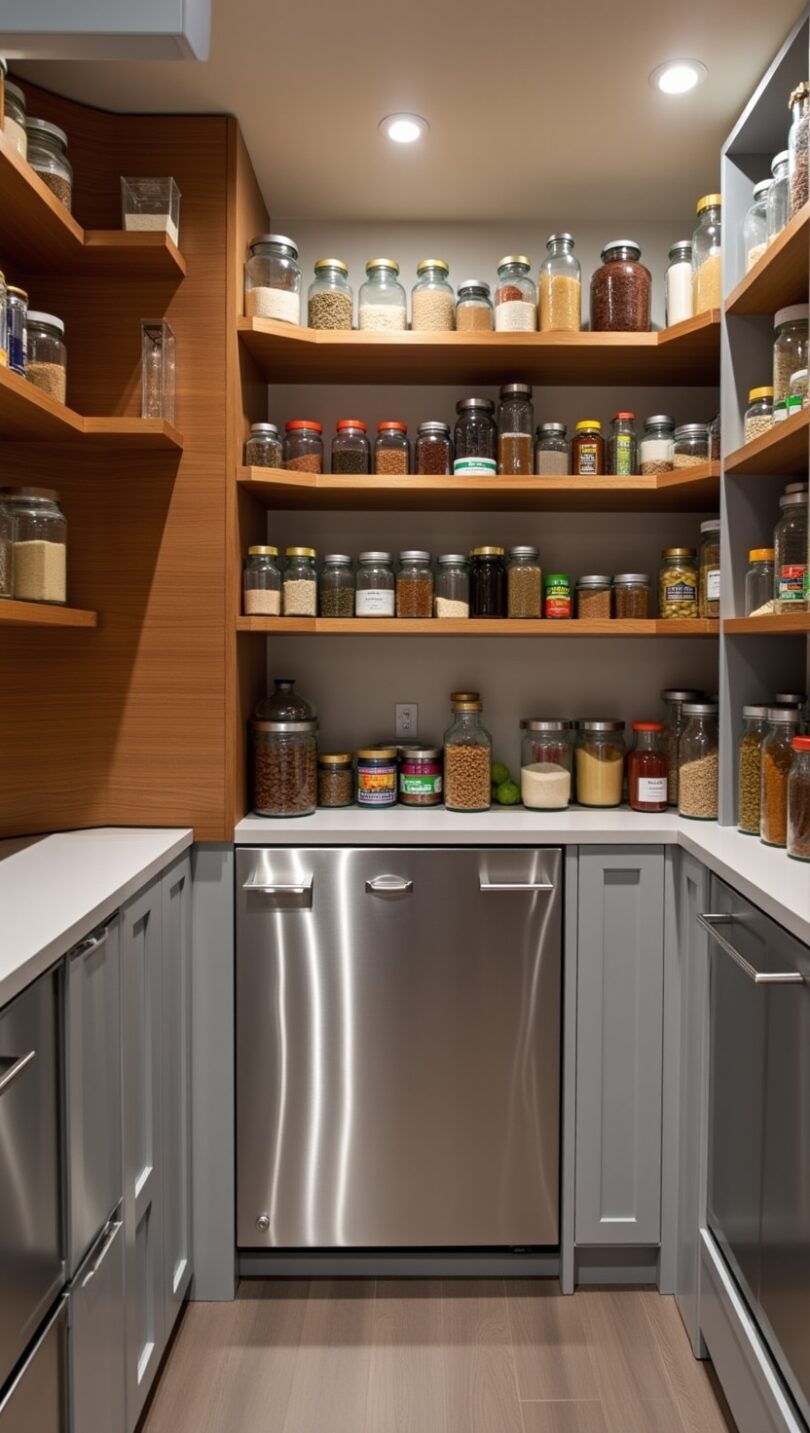
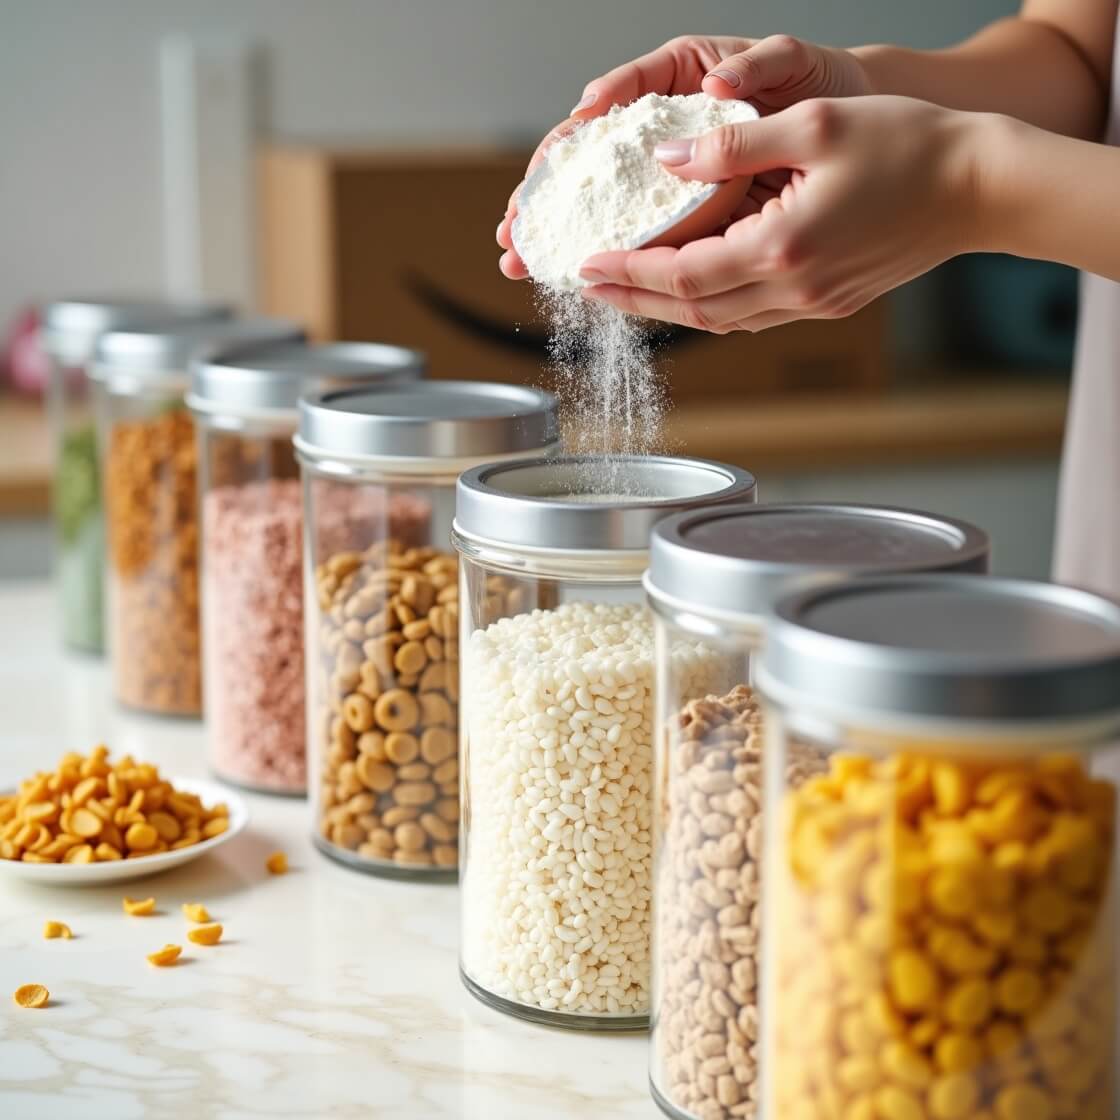
Step 2: Clear Containers—My Unexpected Obsession
I never thought I’d be the person who geeks out over storage containers, but here we are.
There’s something ridiculously satisfying about pouring flour or cereal into a clear, airtight bin.
I picked up a set of Vtopmart Airtight Food Storage Containers after reading a bunch of reviews.
Not only does everything stay fresh, but I can actually see what I have—no more buying a third bag of pasta because the old one was hiding behind the oatmeal.
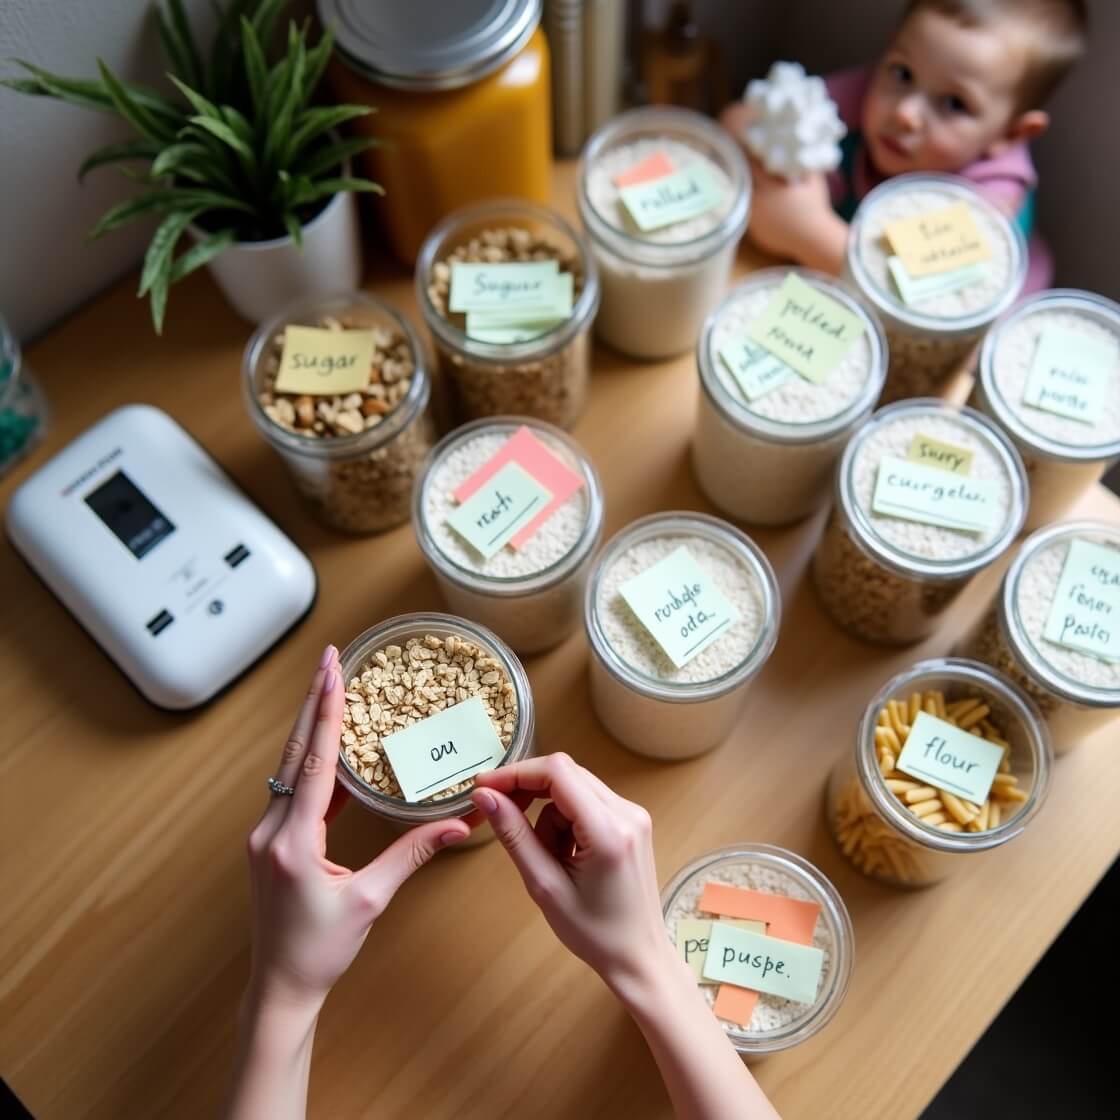
Step 3: Labels—Not Just for Type A People
I used to roll my eyes at those perfectly labeled pantries on Instagram.
But then I tried it, and wow, what a difference. I just used a cheap label maker at first, but now I’m hooked.
Even my husband, who is notorious for putting things in random places, can’t mess it up.
The Vtopmart set came with labels, which was a nice bonus.
Step 4: The Magic of Risers and Tiered Shelves
Cans and jars were always my downfall. I’d buy tomato sauce, only to find three more lurking in the back. Enter risers.
I grabbed a Stackable Can Rack Organizer and a simple tiered shelf, and suddenly I could see everything at a glance.
It’s like my own tiny grocery store aisle.
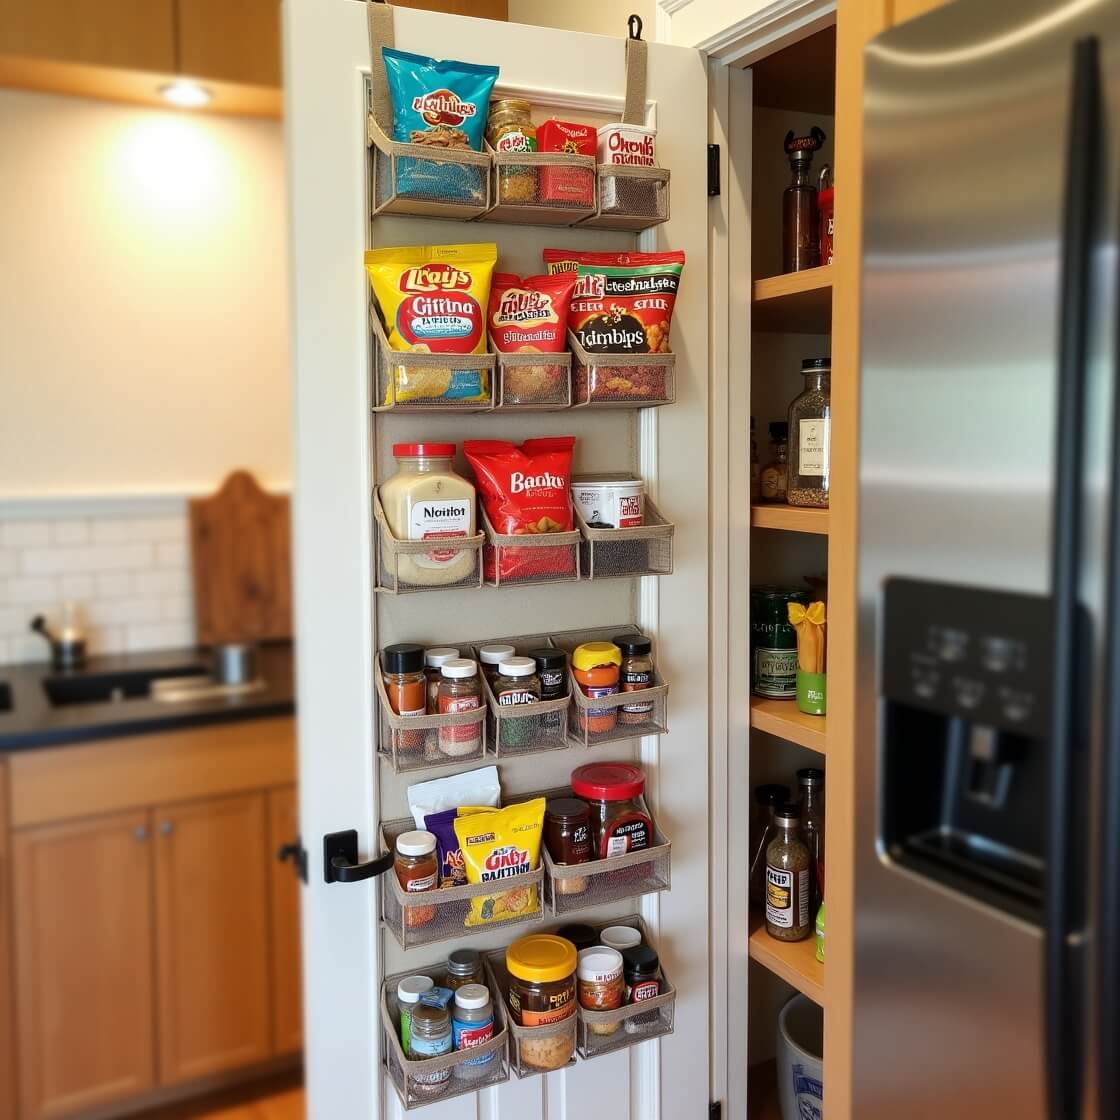
Step 5: Using the Door—Why Didn’t I Do This Sooner?
For years, the back of my pantry door was wasted space.
Now, I’ve got a Moforoco 9-Tier Over-the-Door Organizer hanging there, and it’s a total game-changer.
I stash snacks, spices, and even the dog’s treats in there. It’s wild how much extra space you can create with just one organizer.
Step 6: Zones—The Secret Sauce
I started grouping things by “zones”—breakfast stuff together, baking supplies in one spot, snacks in another.
It sounds simple, but it’s made a huge difference.
Now, when I’m half-awake in the morning, I can find the coffee and granola bars without having to dig through a mountain of pasta.
Step 7: Bins for Snacks (And Kid Chaos)
If you have kids, you know the snack situation can get out of hand fast.
I use HOOJO Pantry Organizer Bins for all those granola bars, applesauce pouches, and random treats.
The bins slide out easily, and my kids can actually find (and put away!) their snacks. Small victories, right?
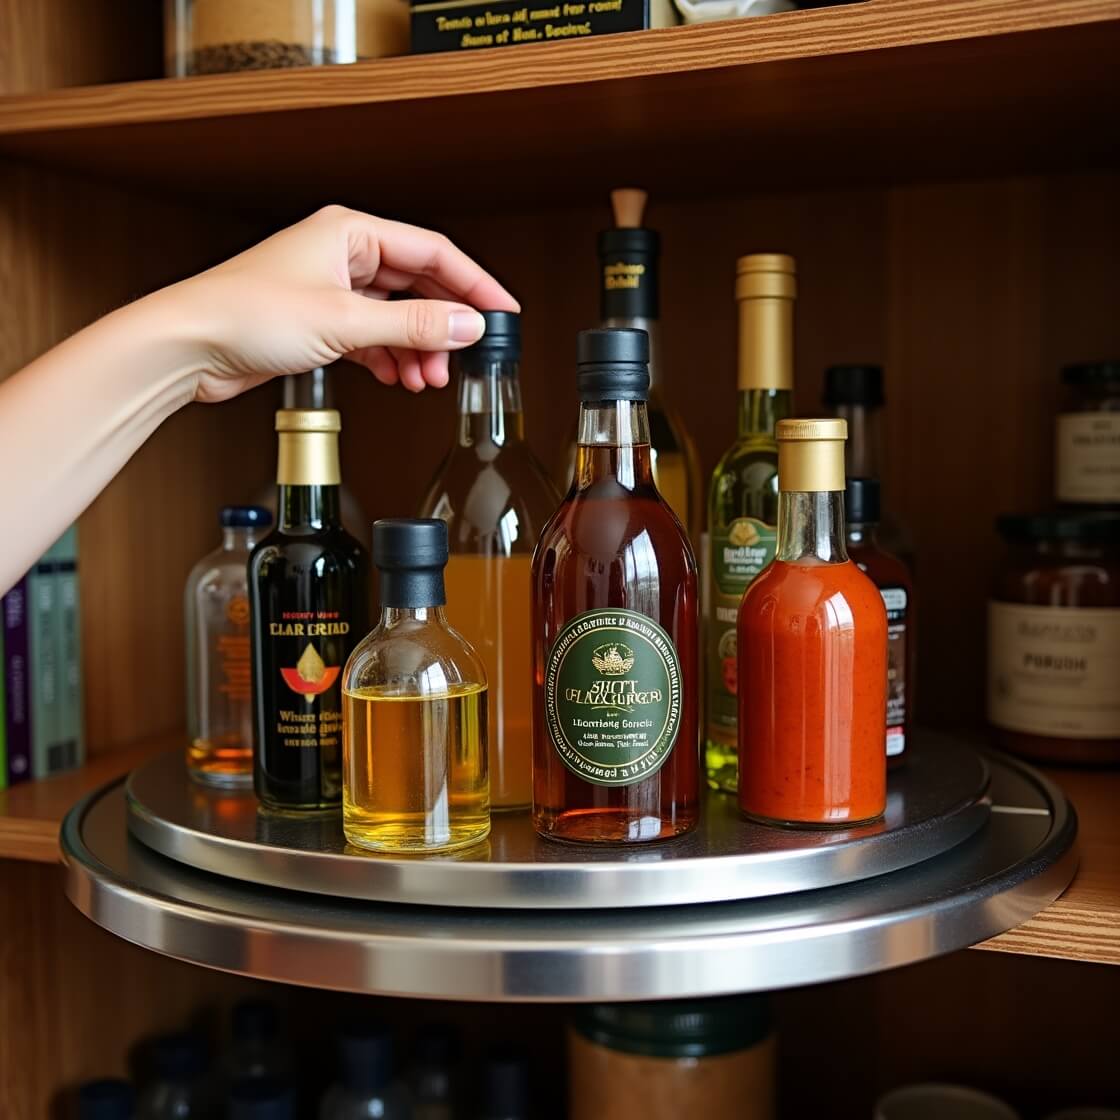
Step 8: Lazy Susans—Not Just for Grandma’s Table
I used to think Lazy Susans were old-fashioned, but they’re a lifesaver for awkward corners.
I keep oils, vinegars, and sauces on a Copco Non-Skid 2-Tier Turntable. No more knocking over bottles just to get to the soy sauce.
Step 9: Bulk Storage Without the Bulk
I love buying in bulk, but those giant bags are a pain. I found the Lifewit Kitchen Pantry Organization Set works perfectly for rice, flour, and sugar.
They stack neatly and keep everything fresh, which means no more wrestling with floppy bags.
Step 10: Make It Pretty—Because Why Not?
I used to think function was all that mattered, but a little style goes a long way.
I lined my shelves with a fun patterned liner and picked up a few matching baskets.
Now, every time I open the pantry, I actually smile. It’s the little things.
What I Wish I’d Known Before
Don’t buy every organizer at once. Start small, see what works, and add as you go. I definitely went overboard at first.
Get everyone involved. My family was skeptical, but now they love how easy it is to find what they need.
It’s okay to tweak things. Life changes, and so do pantry needs. I switch things up every few months.
My Favorite Finds (That I’d Buy Again in a Heartbeat)
Real Life, Real Messes, Real Solutions
I’m not a professional organizer—just a regular person who got tired of the chaos.
My pantry still gets messy sometimes (especially after a busy week), but now it only takes a few minutes to get it back on track.
If I can do it, trust me, you can too.
If you’re staring down a messy pantry right now, just remember: start small, keep it simple, and don’t be afraid to try new things.
And if you discover a trick that works, please share it—I’m always looking for new ideas.